This post describes how, by using the Windows Embedded Standard Tools, you can create a customized Windows Embedded 8 Standard image that boots directly to the Remote Desktop Client Prompt (mstsc.exe).
Get Started
To get started, you'll need 2 things. The Embedded 8 Standard IBW ISO file and the WES8 Tools.
Install the Required Tools
Once you've downloaded the Tools, you'll want to install them. I did a complete install as I built for both WES8x64 & x86. If you're building an x86 image, the ISO will help you along during this install. You may need to copy most of the content from the ISO to the toolkit installation source. you can do this right away or wait for the install to pause and tell you what you need (this is how I did it).
Open ICE and start a Configuration File
- Following the installation, open the Image Configuration Editor (ICE) from your start menu.
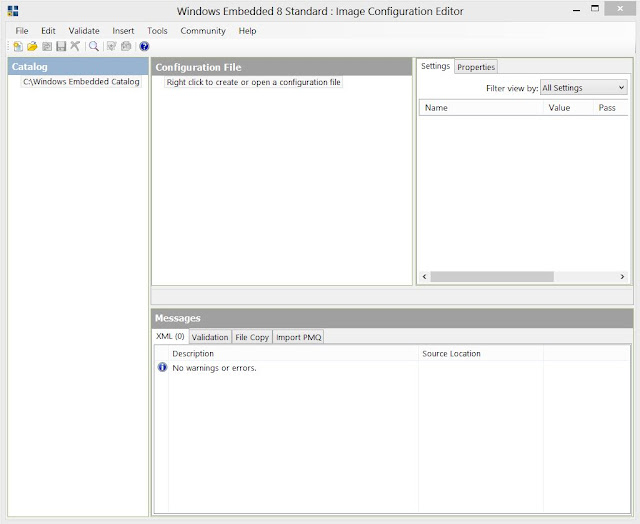 |
| The Image Configuration Editor upon opening |
- Under "Configuration File" in the Center Pane, right click on the underlying text ("Right click to create or open a configuration file").
- Click "New Configuration File"
- You'll then be given the option to name your Configuration File.
 |
| Here, I've named the configuration file, ThinClientConfig. This file replaces the usual Unattend.xml file that you'd normally create in past versions of ICE. |
- After you've clicked the "Create" button, you will see that ICE has populated with the correct Catalog and the Configuration File has been set with the Embedded Core Module. The core module provides basic boot and management functionality. You could create your image at this point, but you wouldn't end up with too much.
Add Modules from the Catalog to your Configuration File
- Next, you'll want to start adding drivers, features, Hotfixes, etc... to your configuration file.
- Expand "Drivers" in the Catalog pane.
- You can right-click on each individual driver category and add them to the configuration file, or you can right click on the top level "Drivers" and add them all.
 |
Catalog Pane with Drivers Expanded
|
- Add the following features:
 |
| Features added for management / thin configuration |
- Add all of the available Hotfixes, Security Updates, and Updates modules as well.
- When you've completed adding all of the modules, click on "Validate" in the menu bar. Select "Add Required Modules"
- The configuration file will be verified and the required modules will be added according to dependencies on those previously added.
Customize Modules For Thin Configuration
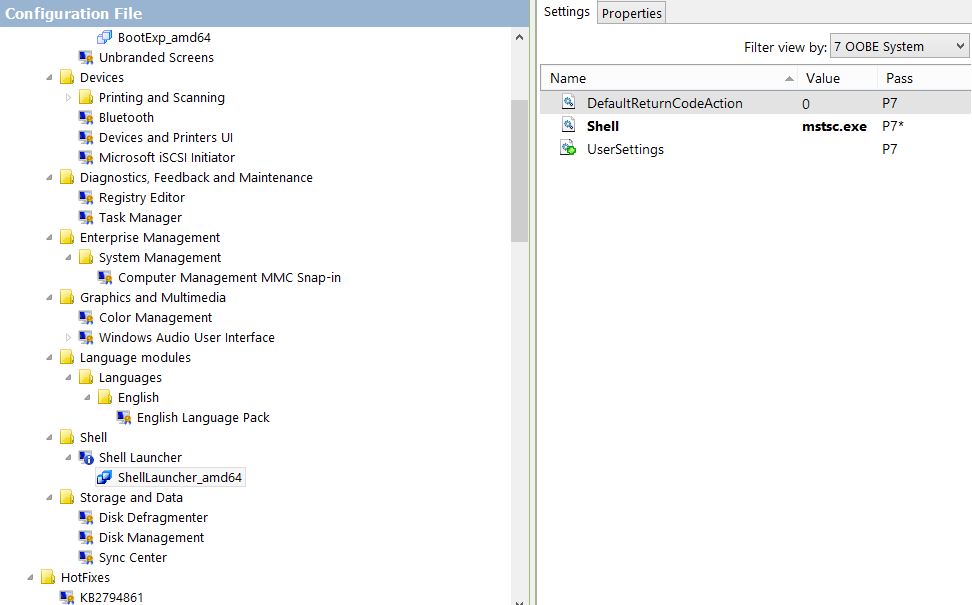
- In the Configuration File pane, expand Features, Shell, Shell Launcher
- Click on ShellLauncher_amd64 or ...(x86).***
- In the Settings/Properties pane on the right, change "Filter view by:" to "7 OOBE System"
- These settings will allow you to choose a different Shell to start with. *
- For "Shell", clear the default of cmd.exe and change it to mstsc.exe **
 |
| Settings for ShellLauncher_amd64 |
- Leave the rest of these settings with their defaults.
- Explore the rest of the module settings and change them as you see fit. Below are a few that I changed to streamline the installation process while testing***:
 |
| These Specify the Language for the Setup in the Windows Pre-Install Environment |
 |
| These specify the language for the OS |
 |
These Specify some of the Options that help you through the minisetup faster
 |
| You can add the Organization Name, EULA Accept, Name, and Product Key in Setup_Amd64 |
|
Try out the configuration file
- Save the Configuration file to a network share.
- If using a VM boot your machine using the ISO for the Windows Embedded 8 Standard IBW. If you're using a physical machine, you'll need to burn the ISO to a disk and boot to the disk.
- Click "Launch WinPE Command Prompt"
- In the command prompt, type: net use k: \\shared\network\path
- This will map a network drive using the letter "K" (you can choose whichever letter you'd like)
- \\Shared\network\path should be where you've placed the configuration file
- Provide your credentials in the domain\username format
- Close the Command Prompt window
- Click "Deploy a Configuration File or WIM"
- Navigate to your newly mapped drive (k: in my case)
- Find your Configuration File, highlight it, and click the Open button
Foot Notes
- You can right-click on many of the modules and open the help dialogue. This will give you a detailed explanation about each.
- *Normally, Windows boots using explorer.exe as it's shell. Explorer.exe is not only windows explorer/File Explorer, but it also encompasses your desktop, task bar, etc...
- **mstsc.exe is the executable for the remote desktop client
- ***If you're working with an x86 image, you'll need to use the x86 suffixed options instead of the amd64 ones.
- When you've completed these steps and your WES8 image has installed, you may want to launch other applications other than the Remote Desktop Client. To do so, Click "Options" in the bottom left of the RDC, click on the Open button, and type the application that you want in the address field. i.e. cmd.exe, explorer.exe, regedit.exe, compmgmt.msc, etc...
- Configure other options via group policy like disabling changing the password, access to the task manager, running applications, etc...